

How to Use a Marble countertop repair kit for Perfect Results
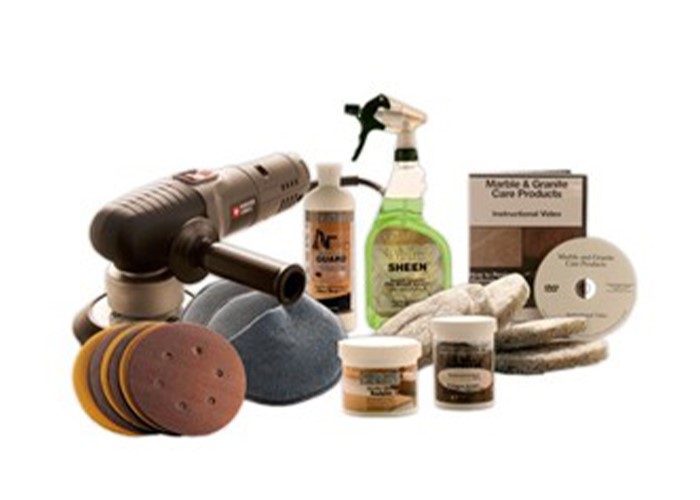
Marble countertops are stunning — until a glass of lemon juice or a splash of vinegar leaves behind a dull, cloudy spot. If you’ve ever stared at an etched marble surface and felt your heart sink, you’re not alone. The good news? You don’t need to call a professional or replace your countertop. With the right marble countertop repair kit, you can restore that glossy finish yourself in under an hour.
This guide walks you through everything you need to know about choosing and using a marble countertop repair kit the right way.
What Causes Marble Etching?
Before jumping into the fix, it helps to understand the problem. Marble is a calcium-based stone, which means it reacts chemically to acidic substances — coffee, wine, citrus juices, and even common household cleaners. The result is countertop etch repair territory: dull, whitish marks that look like scratches but are actually surface erosion.
Etches are not stains. You can’t clean them away with soap and water. That’s exactly why a dedicated marble countertop repair kit is your best tool for the job.
What’s Inside a Good Marble Countertop Repair Kit?
Not all kits are created equal. A quality marble countertop repair kit should include:
- A marble etch remover kit compound designed specifically for calcium-based stones
- Polishing powder or cream for surface restoration
- Buffing pads in multiple grits (fine and ultra-fine)
- Clear application instructions with before/after guidance
- A sealant or finishing spray to protect the surface post-repair
Avoid generic stone repair products. Marble requires a pH-neutral, non-abrasive formula, and a proper marble etch remover kit is specifically engineered for that.
How to Use a Marble Countertop Repair Kit Step by Step
Getting great results from your marble countertop repair kit comes down to prep and technique. Here’s how to do it right:
- Clean the surface — Use a soft cloth and warm water to remove any dust or residue. Never use vinegar or acidic cleaners before countertop etch repair, as this will worsen the damage.
- Apply the etch remover compound — Using your marble etch remover kit, dab a small amount of the polishing compound directly onto the etched area.
- Buff in circular motions — Use a buffing pad and apply light-to-medium pressure in small circles. Work in 2–3 minute intervals and check your progress frequently.
- Wipe and inspect — Clean the area with a damp cloth and assess the repair. For deeper etches, repeat the countertop etch repair process 2–3 times.
- Seal the surface — Once satisfied, apply a marble sealant to protect the repaired area from future damage.
The entire countertop etch repair process for a light etch takes about 20–30 minutes. Deep scratches may need a more aggressive grit pad before switching to fine polishing.
Choosing the Right Kit for Your Marble Type
Marble comes in many varieties — Carrara, Calacatta, Emperador, and more — and each has a slightly different surface hardness and finish. When selecting a marble countertop repair kit, check that the product is safe for your specific marble type. Polished marble needs different care than honed marble; using the wrong abrasive can create more damage than the original etch.
At Marble Cleaning Products, we design our marble countertop repair kit formulas to work across all major marble types and finishes, making it easier to get professional-level results without guesswork.
Common Mistakes to Avoid During Countertop Etch Repair
Even with a great marble countertop repair kit, small errors can lead to disappointing results. Watch out for these:
- Using too much pressure — Aggressive buffing can remove the surface polish unevenly, creating a patchy look after countertop etch repair
- Skipping the seal — Repaired marble is temporarily more porous; always finish with a sealant
- Using the wrong pad — Steel wool or rough scrubbers will scratch the surface further; always use the pads included in your marble etch remover kit
- Ignoring the etch type — Light water rings need only fine polishing, while deep chemical etches need a full countertop etch repair cycle with coarser compounds first
When to DIY vs. Call a Professional
A marble countertop repair kit handles most light to moderate etches and surface dullness with ease. However, if you’re dealing with deep cracks, chips that expose the stone’s core, or large-scale damage across an entire slab, professional restoration may be necessary.
A good rule of thumb: if you can feel the etch with your fingernail and it’s less than 1mm deep, a marble etch remover kit will handle it. Deeper structural damage is a job for a stone fabricator.
Protect Your Marble After Repair
The best countertop etch repair is the one you never have to do twice. Once you’ve restored your surface, take steps to prevent future etching:
- Use coasters under all glasses and bottles
- Wipe up spills immediately, especially citrus and alcohol
- Clean regularly with a pH-neutral marble-safe cleaner
- Reseal your countertop every 6–12 months
Marble Cleaning Products offers a complete line of protective sealants and daily cleaners designed to keep your marble looking its best between marble countertop repair kit treatments.
Final Thoughts
Marble countertops are an investment worth protecting. Whether you’re dealing with a fresh etch or years of surface dullness, the right marble countertop repair kit gives you the power to restore your countertop’s beauty without the cost of professional services. From light polishing to full countertop etch repair, today’s kits — especially those that include a dedicated marble etch remover kit — make DIY restoration genuinely achievable for any homeowner.
For more on caring for natural stone surfaces, the Natural Stone Institute offers trusted maintenance standards.